|
|
(for example, a picture of your mom)
into a PC lab on campus that has a scanner
(Click here for scanner locations)
(much like you would if you were using a copy machine)
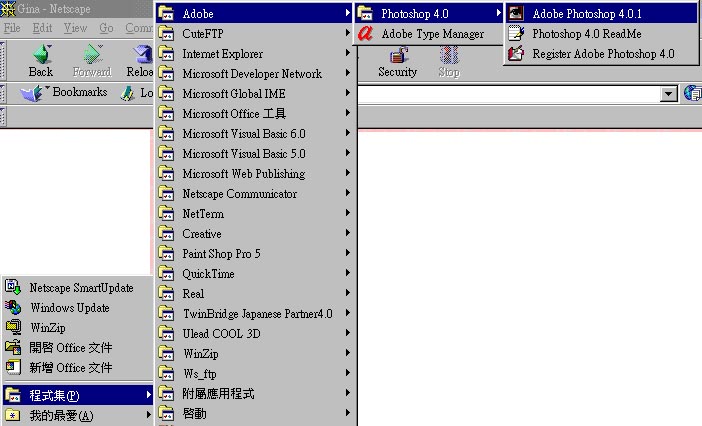 |
- Then you click on File, and choose Import, and choose TWAIN...

- HP DeskScan II is fairly intuitive, so when you start the application
- Now that you have the type of image chosen,
- This will produce a small image, but don't worry about that.
- Now that you are satisfied and sure you have "outlined"
- Now you can save your image.
make sure to choose the proper type of object you are going to scan.
you are ready to scan it. Click on the Preview button
to get a small "preview" of your image.
The file you produce will contain a full-size image.
Your image will be surrounded by a rectangular box.
Click on and move the sides of that box
to capture exactly the portion of the image that you want.
what you want, click on the Final (©w½Z) button.
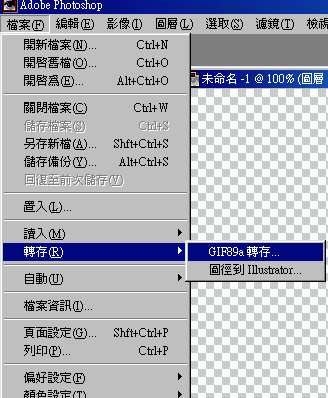
Click File, and choose Export, then choose GIF89a Export
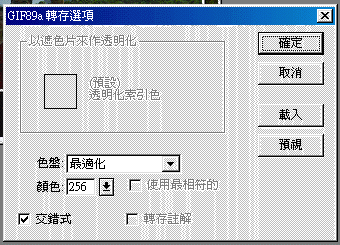
- Then there is a table. Just click on ½T©w or OK
11. Next a Save
As box will pop up.
Select your A:
directory and give the file a name. Now click on Save.
12. Now all you need to do is change
the permissions of the file
and congratulations, you have your newly scanned
image in your A: directory
and ready to use on your web page.
